How To Install Storm Shutters
In any storm there are two elements that do the most damage, water and wind. When the water levels rise and it starts entering your home there isn’t much you can do to stop it. The same can be said for wind. In a hurricane or tornado where winds reach upwards of 100 mph, they put tremendous pressure on a home, pounding at its windows and doors. If they aren’t broken that way, the wind can also send airborne debris crashing through them.
The easiest solution is to install storm shutters. The most effective type is a rolling shutter. They are usually made of steel or aluminum and are permanently installed to the exterior of your home. By simply calling a storm shutter service such as Rollac, our experts can help you select and install them.
But if a storm is approaching and you don’t have the luxury of time, or you want to do it yourself, then corrugated aluminum hurricane shutters are a simple, effective, and affordable way to cover your window and door openings.
Corrugated Aluminum Shutters Parts
A storm shutter service such as Rollac is your smartest option when you want to install a permanent storm shutter. However, aluminum shutters are quick and easy to install, remove, and store after the storm has passed. They are lightweight yet incredibly strong. When correctly installed they’re capable of withstanding upwards of 1,000 lbs. of force per square inch.
Corrugated aluminum shutters can be installed using a track system. The storm shutter parts for this method include two tracks that are permanently affixed to the exterior of the house.
How to install corrugated aluminum shutters
The following is a brief step-by-step guide to installing corrugated aluminum shutters.
- Hold the header track, the first storm shutter part, horizontally above the window.
- Drive in one screw at the approximate center of the header. Make sure it is level before driving in the remaining screws.
- Squeeze a line of silicone caulk along the top of the header to seal out water.
- Slide the storm shutter into the header and with a pencil mark where the bottom part of the shutters comes into contact with the wall below the window.
- One inch below that line measure 1/2” and draw a level line on the wall.
- Hold the second storm shutter part, the bottom track parallel with the level line and drive in the first screw. Make sure it is level before driving in any more screws.
- Slide the upper end of the first shutter into the header.
- Press the bottom of the shutter against the house wall. Make sure the bolts are protruding through the keyhole slots along the bottom of the shutter.
- Place another one of the storm shutter parts, the keyhole washers, onto the bolts. Then screw wing nuts onto each bolt.
- Slip the second shutter into place making sure it overlaps the first one. Make sure the wing nuts are installed after.
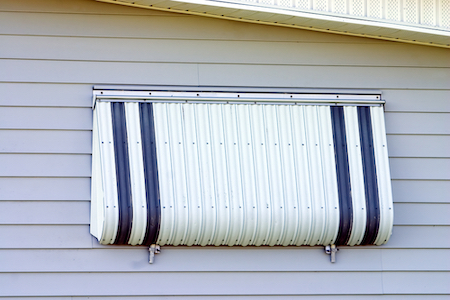
Shutters installed
Experts agree the most effective approach is to consult with a storm shutter service when considering this type of window and door protection for your home. Companies such as Rollac can help you select and properly install some of the most durable storm shutters on the market. However, if you want to do it yourself or you don’t have enough time before a storm arrives, then mounting shutters such corrugated aluminum ones are effective and simple to install.